Skip to content

In this article, we will cover the following points:
- Introduction to monitor mounting: Importance of proper monitor positioning and the benefits of using mounts.
- How to mount a monitor without holes: Explore alternative mounting options such as desk clamps, adhesive mounts, or specialized non-permanent solutions.
- Step-by-step instructions: Provide detailed instructions for each alternative mounting method, including necessary tools and considerations.
- Wall mounting tips: Guidance on how to mount a monitor on the wall, including finding wall studs, using anchors, and ensuring proper weight distribution.
- Troubleshooting common issues: Address common problems encountered during monitor mounting and offer solutions.
- Compatibility considerations: Discuss compatibility of different monitor brands (such as HP, ASUS TUF, LG, MSI, Acer, Alienware) with mounting options and any specific instructions or considerations.
- Recommendations for curved monitors: Discuss the specific considerations and techniques for mounting curved monitors.
1. Introduction to Monitor Mounting
Importance of Proper Monitor Positioning
-
Ergonomics: Incorrect monitor positioning can lead to neck strain, eye fatigue, and discomfort. By mounting your monitor at eye level and adjusting it to the optimal height and angle, you can maintain a more natural and comfortable posture, reducing the risk of musculoskeletal issues.
-
Improved Productivity: A well-positioned monitor allows you to maintain focus and work more efficiently. By reducing eye strain and minimizing the need for constant adjustments, you can enhance productivity and concentration.
-
Clear Viewing Experience: Proper positioning eliminates glare and reflections on the screen, resulting in a clearer and more enjoyable viewing experience. This is especially important when working in brightly lit environments or near windows.
Benefits of Using Mounts:
-
Flexibility: Monitor mounts provide a high degree of adjustability, allowing you to easily tilt, swivel, and rotate your monitor to achieve the optimal viewing angle. This flexibility enables you to customize the position based on your specific needs, whether it's for work, gaming, or multimedia purposes.
-
Space Optimization: Mounting your monitor frees up valuable desk space. By removing the need for a monitor stand, you can declutter your workspace and create a more organized and efficient environment. This is particularly beneficial in compact or multi-monitor setups.
-
Cable Management: Many monitor mounts come with integrated cable management systems. These features help keep your cables neatly organized and out of the way, preventing tangles and further enhancing the aesthetics of your workspace.
-
Versatility: Monitor mounts are designed to accommodate a wide range of monitor sizes and weights. Whether you have a small or large monitor, or even a curved display, there are mounts available to suit your specific requirements.
2. How to Mount a Monitor Without Holes: Explore Alternative Mounting Options
Not all situations or surfaces are conducive to drilling holes for traditional monitor mounting. Fortunately, there are alternative mounting options available that allow you to securely mount your monitor without the need for permanent modifications. Let's explore some of these alternatives:
-
Desk Clamps: Desk clamps are an excellent option if you have a sturdy desk or table with a suitable edge. These mounts typically feature adjustable clamps that securely attach to the edge of your desk, providing a stable platform for your monitor. Make sure to choose a desk clamp mount that can accommodate the thickness and shape of your desk.
-
Adhesive Mounts: Adhesive mounts are ideal for mounting monitors on surfaces where drilling is not an option, such as glass or tile walls. These mounts utilize strong adhesive pads or tapes that create a firm bond between the mount and the surface. Ensure that the adhesive mount you choose is rated to support the weight of your monitor and follow the manufacturer's instructions for proper installation and removal.
-
Specialized Non-Permanent Solutions: There are specialized mounts available in the market that offer non-permanent mounting options. These solutions may include monitor stands with adjustable arms, portable stands, or clamping mechanisms that provide stability without the need for drilling. These mounts often offer flexibility and adjustability, allowing you to position your monitor at the desired height and angle.
When considering alternative mounting options, keep in mind the weight and size of your monitor to ensure compatibility with the chosen mount. It's also essential to read and follow the manufacturer's instructions for installation and safety precautions.
While alternative mounting options provide versatility and convenience, it's important to assess the stability and security of the chosen mount to ensure that your monitor is safely supported. Always monitor the monitor's stability after installation and make adjustments if necessary.
3. Step-by-Step Instructions: Alternative Mounting Methods
When it comes to mounting a monitor without holes, different alternative methods require specific steps and considerations. Here, we provide detailed instructions for each alternative mounting method, along with the necessary tools and considerations:
1. Desk Clamps:
Step 1: Ensure that your desk or table has a suitable edge for mounting. It should be sturdy and thick enough to accommodate the clamp securely.
Step 2: Position your monitor and the desk clamp in the desired location on the desk.
Step 3: Loosen the clamp screws and open the clamps wide enough to fit the desk's edge.
Step 4: Place the clamps around the desk's edge and tighten the screws until the clamp is securely attached.
Step 5: Adjust the arm or bracket of the mount to the desired height and tilt angle for your monitor.
Tools Required: Desk clamp mount, screwdriver (if necessary).
Considerations: Ensure that the desk clamp is compatible with the thickness and shape of your desk's edge. Check the weight and size limitations of the clamp to ensure it can support your monitor properly.
2. Adhesive Mounts:
Step 1: Clean the mounting surface thoroughly with a mild cleaning agent and allow it to dry completely.
Step 2: Position the adhesive pads or tapes on the back of the monitor mount according to the manufacturer's instructions.
Step 3: Remove the protective film from the adhesive pads or tapes.
Step 4: Carefully position the monitor mount on the desired location on the wall or surface, applying even pressure to ensure a secure bond.
Step 5: Hold the mount in place for the recommended duration to allow the adhesive to bond properly.
Tools Required: Adhesive mount, mild cleaning agent, cloth.
Considerations: Ensure that the adhesive mount is suitable for the surface material and weight of your monitor. Follow the manufacturer's instructions for weight limitations and installation guidelines. Keep in mind that adhesive mounts may not be suitable for all surfaces, so assess the surface's condition and compatibility before proceeding.
3. Specialized Non-Permanent Solutions:
Step 1: Depending on the specific non-permanent mount, follow the manufacturer's instructions for assembly or setup.
Step 2: Position the non-permanent mount on your desk or chosen surface.
Step 3: Adjust the arms, brackets, or clamping mechanisms to securely hold your monitor in place.
Step 4: Ensure that the monitor is at the desired height and angle for optimal viewing.
Tools Required: Non-permanent mount (according to the specific type), if any.
Considerations: Different non-permanent mounts may have unique assembly or installation requirements. Always refer to the manufacturer's instructions for the specific mount you are using. Take note of weight limitations and ensure that the non-permanent mount is suitable for your monitor's size and weight.
By following these step-by-step instructions for each alternative mounting method, you can successfully mount your monitor without the need for holes. Always refer to the manufacturer's instructions and guidelines for the specific mount you are using to ensure proper installation and stability.
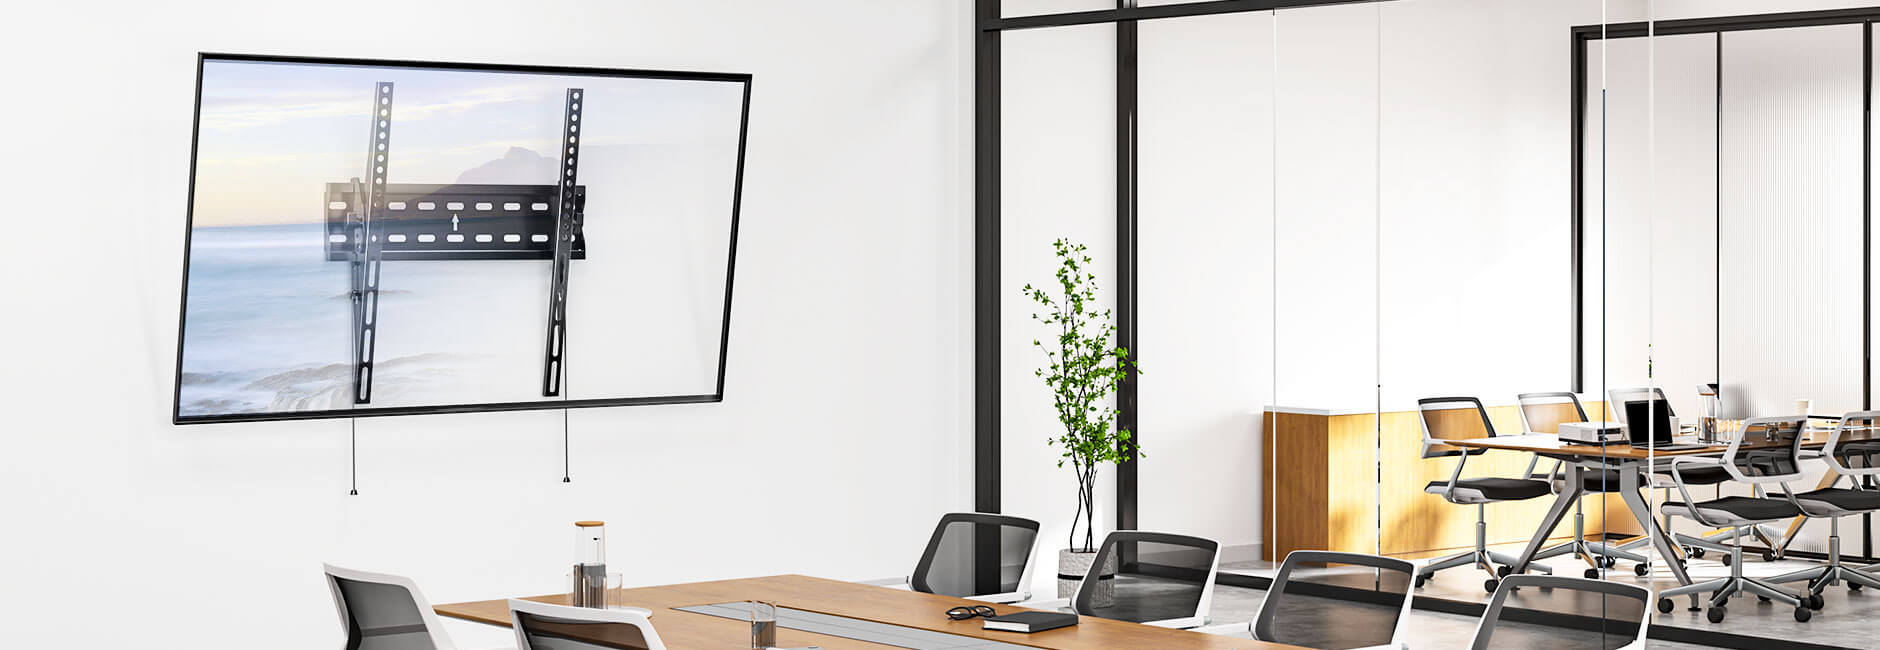
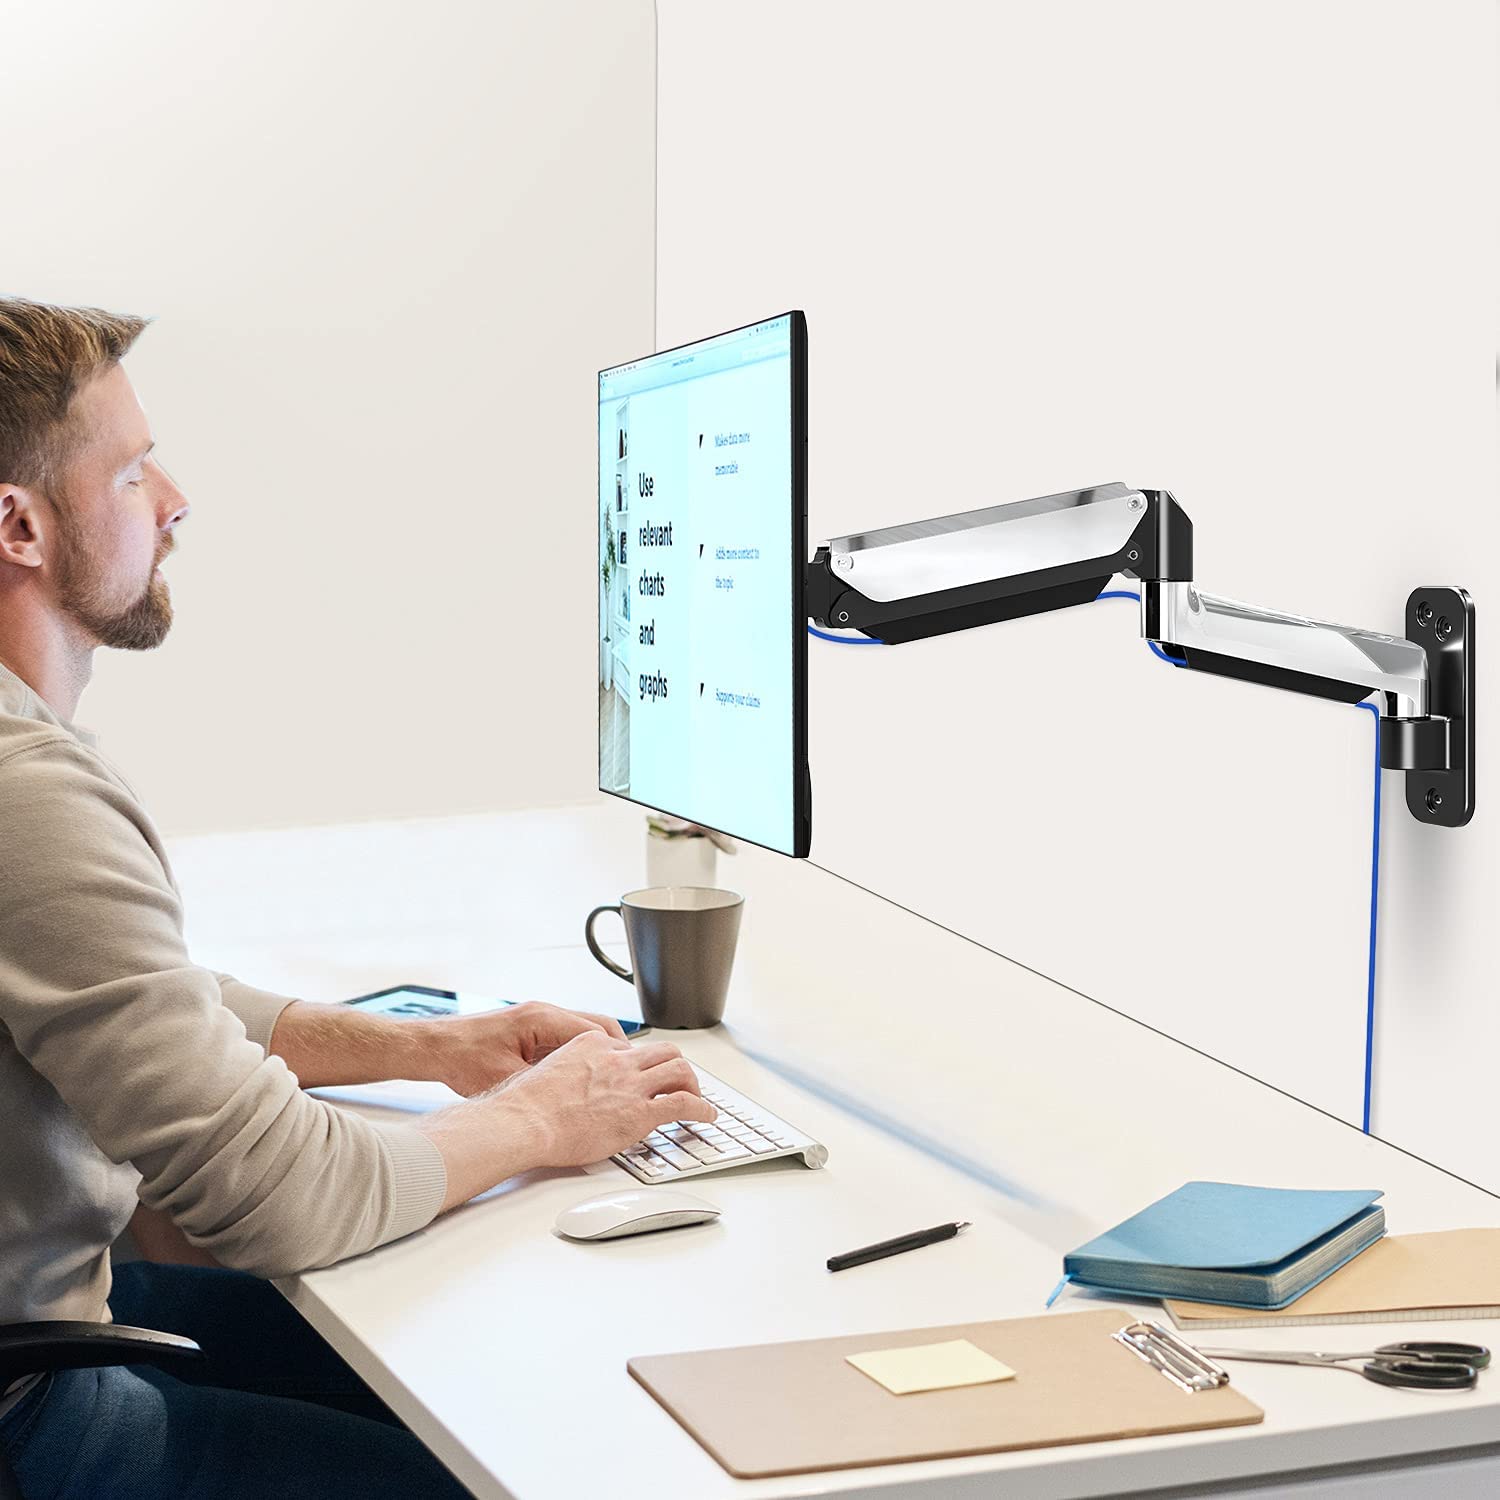
4. Wall Mounting Tips: Mounting a Monitor on the Wall
Mounting your monitor on the wall can be a space-saving and aesthetically pleasing solution. To ensure a secure and stable installation, follow these tips and guidelines:
1. Finding Wall Studs:
Using wall studs is crucial for a secure mount, as they provide the necessary support. Here's how to find wall studs:
a. Use a stud finder: A stud finder is a handy tool that detects the presence of studs behind the wall. Move it horizontally along the wall until it signals the location of a stud.
b. Knocking method: Gently tap the wall with your knuckles. A hollow sound indicates the absence of a stud, while a solid and dense sound indicates a stud's presence.
c. Measure from electrical outlets or switches: Wall studs are typically located near electrical outlets or switches. Measure a standard distance (usually 16 or 24 inches) from these points to locate the studs.
2. Using Anchors:
If you're unable to mount your monitor directly into wall studs, you'll need to use wall anchors to provide additional support. Here's how to use anchors:
a. Choose the right anchors: Select anchors suitable for the weight of your monitor. Plastic or metal toggle bolts, molly bolts, or wall anchors with screws are common options.
b. Drill pilot holes: Use a drill bit slightly smaller than the diameter of the anchor to drill pilot holes into the wall at the marked locations.
c. Insert the anchor: Place the anchor into the pilot hole and tap it gently with a hammer until it's flush with the wall.
d. Secure the mount: Attach the mount to the wall by inserting the screws into the anchors and tightening them securely.
3. Ensuring Proper Weight Distribution:
Proper weight distribution is essential to maintain stability and prevent damage to the wall. Consider the following:
a. Check the weight limit: Ensure that the wall mount is rated to support the weight of your monitor. Exceeding the weight limit can compromise the mount's integrity.
b. Use multiple studs or anchors: If your monitor is particularly heavy, distribute the weight across multiple wall studs or use multiple anchors to provide better support.
c. Follow manufacturer instructions: Always refer to the manufacturer's instructions for specific weight distribution guidelines and mounting requirements.
Additional Tips:
- Use a level to ensure that the mount is straight before securing it in place.
- Hide cables and cords by using cable management solutions or wall-mounted cable covers.
- Consider the viewing angle and height of the mounted monitor to optimize your viewing experience.
By following these wall mounting tips, you can ensure a secure and stable installation of your monitor. Remember to use appropriate wall-mounting hardware, locate wall studs or use anchors, and distribute the weight properly to maintain the safety and longevity of your setup.
5. Troubleshooting Common Issues: Addressing Problems Encountered During Monitor Mounting
While mounting a monitor can be a straightforward process, you may encounter some common issues along the way. Here are some troubleshooting tips and solutions to address these problems:
1. Alignment and Leveling Issues:
Problem: Your monitor mount may not be aligned or leveled correctly, resulting in an uneven or tilted display.
Solution:
- Use a level to ensure that the mount is straight and level. Adjust the mount's screws or brackets accordingly to achieve proper alignment.
- Double-check that all screws are securely tightened to prevent any movement or slippage.
2. Weight and Stability Issues:
Problem: Your monitor may not be properly supported or may wobble on the mount.
Solution:
- Confirm that the mount you are using is rated to support the weight and size of your monitor. Exceeding the weight limit can lead to instability.
- If using a wall mount, ensure that the mount is securely attached to wall studs or anchored properly.
- Consider using additional support, such as reinforcing the mount with extra screws or brackets, to improve stability.
3. Cable Management Problems:
Problem: Cables and cords may be dangling or creating a messy appearance.
Solution:
- Use cable management solutions, such as adhesive cable clips or cable sleeves, to route and secure the cables neatly along the mount or wall.
- Consider using zip ties or Velcro straps to bundle and organize cables for a clean and organized look.
4. Compatibility Issues:
Problem: You may encounter compatibility issues when attempting to mount your monitor, such as incompatible VESA patterns or mounting hole distances.
Solution:
- Ensure that the monitor and mount have matching VESA patterns. The VESA pattern refers to the arrangement of mounting holes on the back of the monitor. Check the monitor's specifications or the mount's documentation for compatibility information.
- If the VESA patterns do not match, consider purchasing an adapter plate that can bridge the gap between the monitor and the mount.
- Verify that the mount supports the size and weight of your monitor. Refer to the manufacturer's guidelines for compatibility information.
5. Adjustability and Range of Motion:
Problem: You may find that your monitor mount lacks the desired range of adjustability or freedom of movement.
Solution:
- Before purchasing a mount, ensure that it offers the desired adjustability options, such as tilting, swiveling, or rotating, to meet your specific needs.
- Consider mounts with gas spring arms or articulated arms for enhanced flexibility and precise positioning.
By addressing these common issues and applying the corresponding solutions, you can troubleshoot problems encountered during monitor mounting. Remember to read and follow the manufacturer's instructions carefully and seek assistance or professional advice if needed. A well-mounted monitor will enhance your ergonomic setup and improve your overall computing experience.
6. Compatibility Considerations: Mounting Options for Different Monitor Brands
HP, ASUS TUF, LG, MSI, Acer, Alienware etc. monitors generally follow standard VESA mounting patterns, making them compatible with a wide range of mounts. However, it's crucial to check the specific model's specifications and VESA pattern requirements before purchasing a mount. Some models may have unique VESA patterns or additional mounting requirements, so always refer to the manufacturer's instructions or documentation for specific instructions. If in doubt or if the information is not readily available, reach out to the manufacturer's customer support for assistance. By ensuring compatibility and adhering to the manufacturer's guidelines, you can safely and securely mount your monitor from various brands.
7. Recommendations for Mounting Curved Monitors
Mounting a curved monitor requires specific considerations to ensure an optimal viewing experience. Here are some recommendations and techniques for mounting curved monitors:
1. Select a Compatible Mount:
When choosing a mount for a curved monitor, ensure that it is compatible with curved displays. Look for mounts that explicitly mention support for curved monitors or those that offer adjustable brackets to accommodate the curvature. This will ensure a secure and stable fit for your curved monitor.
2. VESA Compatibility:
Check if your curved monitor has a VESA mount pattern on the back. Most curved monitors have VESA mounting holes, allowing them to be attached to VESA-compatible mounts. Verify the specific VESA pattern and size requirements of your curved monitor, as it may vary depending on the model. Match the VESA pattern of the mount with that of your curved monitor for a proper fit.
3. Consider the Curvature and Viewing Angles:
Take into account the curvature and viewing angles of your curved monitor when positioning and angling it on the mount. Curved monitors are designed to enhance the immersive viewing experience, and angling the monitor correctly can optimize visibility. Adjust the mount's tilt and swivel features to align with the monitor's curvature and your preferred viewing angles.
4. Distance from the Wall:
When mounting a curved monitor, consider the distance from the wall to ensure that the curve is not too close or too far for comfortable viewing. A general guideline is to position the monitor so that the curvature is noticeable but not excessively pronounced. Experiment with different distances and angles to find the position that offers the best viewing experience for your curved monitor.
5. Cable Management:
Ensure proper cable management to maintain a neat and organized setup. Curved monitors may require longer cables due to their larger size and mounting positions. Use cable clips, sleeves, or adhesive mounts to route and secure the cables along the mount or wall. This will prevent cable clutter and ensure a clean appearance.
6. Stability and Weight Considerations:
Confirm that the mount you choose is capable of supporting the weight and size of your curved monitor. The curvature of the monitor may affect its weight distribution, so ensure that the mount is rated to handle the specific weight and dimensions. Follow the manufacturer's guidelines and weight limits to maintain stability and prevent any strain on the mount.
By following these recommendations and considering the specific characteristics of curved monitors, you can successfully mount and position your curved monitor for an immersive and enjoyable viewing experience. Always refer to the manufacturer's instructions and guidelines for your specific curved monitor and mount to ensure proper installation and stability.
Properly mounting your monitor can significantly enhance your workspace, improve ergonomics, and optimize your viewing experience. In this guide, we've discussed various aspects of monitor mounting, including the importance of proper positioning, alternative mounting options, step-by-step instructions, wall mounting tips, troubleshooting common issues, compatibility considerations for different monitor brands, and recommendations for mounting curved monitors.
By following the guidelines and techniques provided, you can confidently mount your monitor, whether it's on a desk, wall, or using specialized mounting options. Ensure compatibility, consider the specific requirements of your monitor brand, and address any troubleshooting issues that may arise during the installation process.
Now that you have a better understanding of monitor mounting, it's time to explore our collection of high-quality monitor mounts. Our carefully curated selection includes a wide range of options, from desk mounts and wall mounts to specialized non-permanent solutions. Browse MOUNTUP's monitor mount's collection and find the perfect mount for your monitor.
If you want to explore further how to choose a monitor, you can read: